Wednesday, January 26, 2011

Panini Bread


Sandwiches are so versatile donchya think? The panini is no exception. Its origins are Italy where they are known as panino. Panini is actually the pleural form of the word. Made popular in New York in the 1970s and 1980s, this type of 'flat bread' sandwich is now very popular everywhere.

I like a good challenge so this week I decided, what the heck, time to make my own panini bread. The slow winter time is starting to wind down and activities are picking up. Soccer practice starts this week and Little League will be following shortly. The Corey is now back in school (he started back to college last Fall BTW) Even though the bread takes some planning, injecting sandwich night into our rotation of dinners has certainly become commonplace on busy school nights.

First of all, you will want to set aside some time for this one. The "starter" needs to set out overnight, & the rising and baking combination will take around 5 hours once the starter is ready. One of my favorite sites to get bread recipes is King Arthur Flour. My search for panini bread didn't take long, as they had what looked like a great one.

If you haven't made any type of bread before this may not be the one to start with, as it is extremely sticky but if you feel comfortable gauging the stickiness factor then, well, go on girl!

So, they call the starter Biga, which if you are interested in the history of it, a quick jont on over to zee Wiki yields this definition. You don't really have to know what it is, I suppose, but I was curious.


So, start your Biga with 1 1/2 cups unbleached all-purpose flour:


Add 1 cup of water & 1/8 teaspoon of instant yeast:

And mix it up until smooth. Then, cover it up and let it sit overnight. This will give your bread some layered flavor and help with the light airiness you'll want.

Being that I wanted to make the bread the same day I started my starter early in the morning and let it set out for 8 hours instead of overnight. It can set out for up to 15 hours, though.


Once it has sat out for a while you will add together the Biga, 1 teaspoon of instant yeast, 1/2 cup of unbleached all-purpose flour, 1 cup of white whole wheat flour, 1 1/4 teaspoons salt, 1 teaspoon sugar, 1 tablespoon of nonfat dry milk, 2 tablespoons of olive oil, and 1/4 to 1/2 cup water.

The website suggests that you use more water in the winter. As you bake more and more bread you will be able to gauge how much water to add to your dough to get the desired feel. Since it is indeed winter (sigh) I added 1/2 cup.


Next, mix it up on medium speed, about a 4 on my mixer as suggested, but watch out. You may want to start at 1 and work up to a 4, because if you start right into a 4 it will spray flour all over you. Ask me how I know.

So, wipe the flour off of your face, shirt, jeans and well, the dog already has it licked off of the floor so there's 1 less step. Where were we? Ah yes, mix it up with a flat beater until it clears the sides of the bowl, about 3 minutes. If it's not clearing it keep mixing for another couple of minutes.


Switch to your dough hook and mix it up for another 3-4 minutes.


Put in a lightly greased bowl, cover, and let it sit for 2 hours in a warm, dry place. If you are around to punch it down after about an hour then go for it. Or let your kids do it. Because if you are like me, you want to keep them from punching each other, and maybe this will help. Parenting 101, by Pamela S.


After 2 hours of rise time, lightly grease a baking sheet. Divide the dough in half and shape each one into a 10 " log. Put dough on pan and spread out to about 3 " wide. When I tried to shape the log it was very sticky but able to keep the shape. I just laid the dough straight onto the pan and shaped it there because it stuck too much to the wooden board I usually use to roll out the dough. Cover with heavily oiled plastic wrap.

It starts out like this:


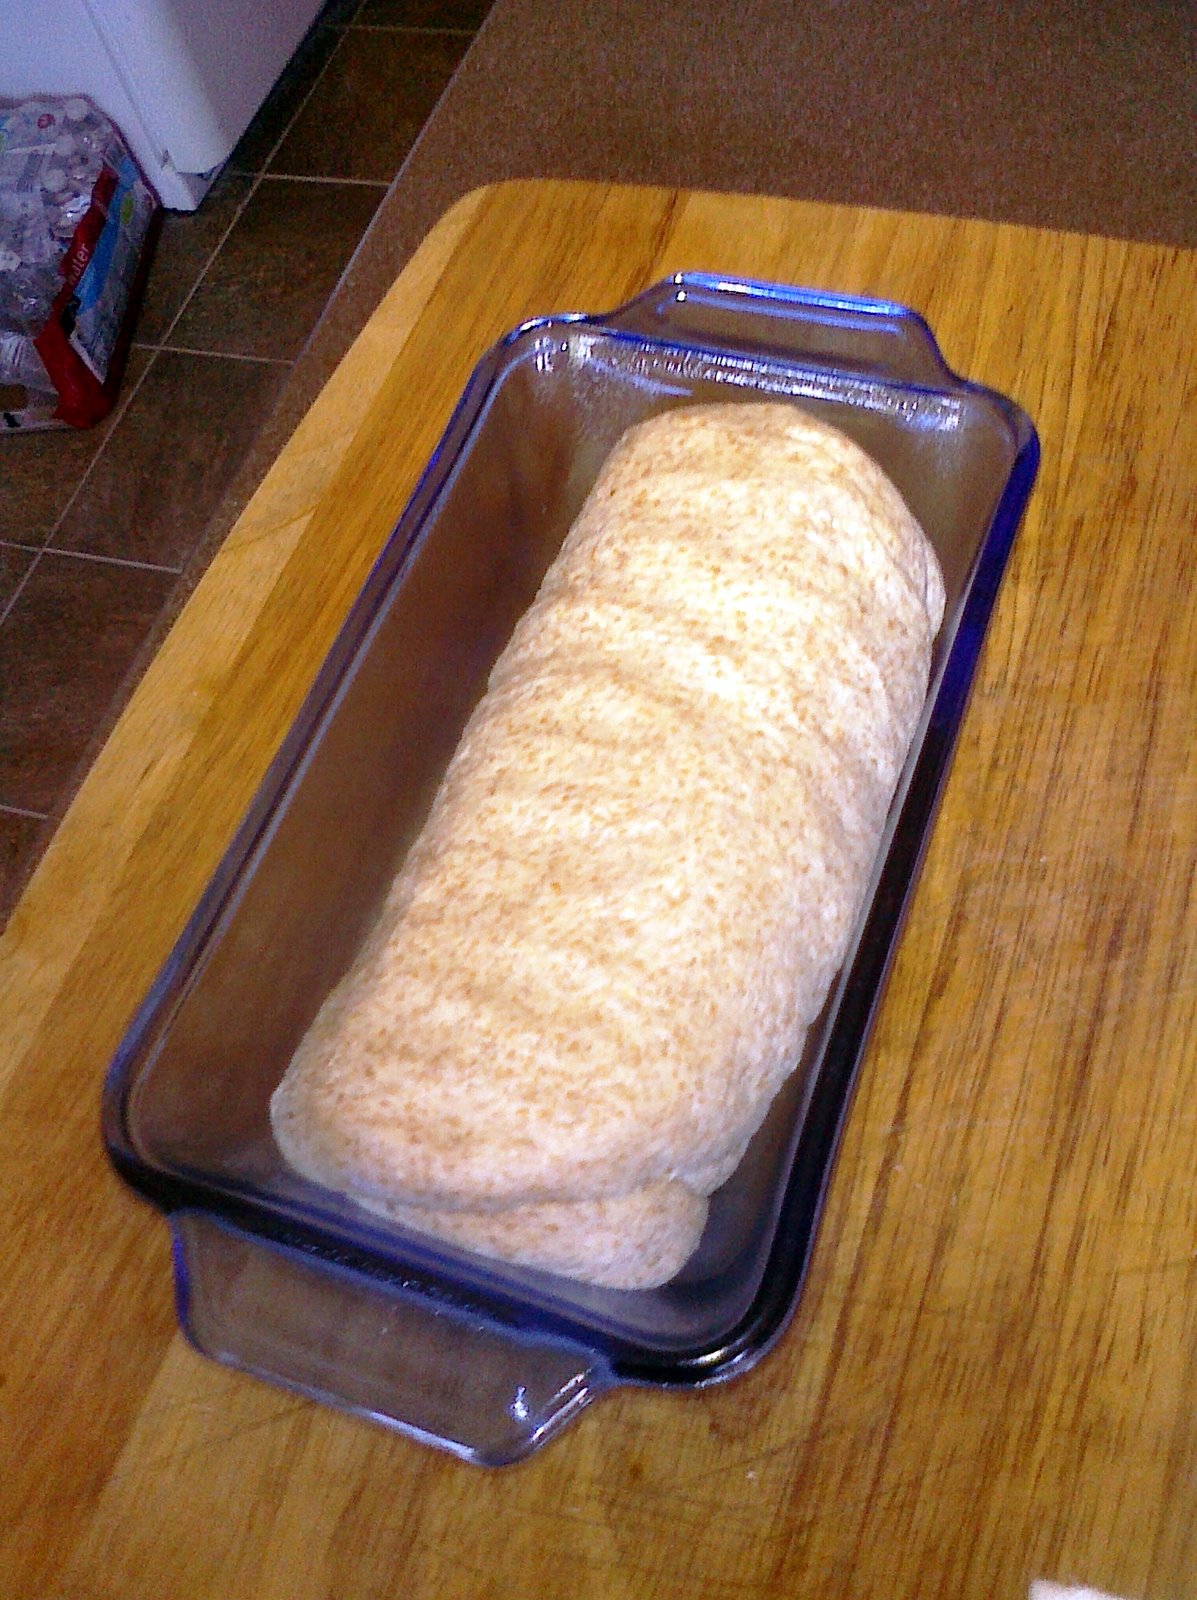
And, after 2 more hours of rise time, looks like this: I separated it with a knife just enough so it wouldn't bake together. The dough, at this point will have a consistency like Jello, very light, and wiggly.


In a preheated oven at 425°, bake the bread for 22-25 minutes.


After the time is up take the bread off of your pan, turn the oven off, and sit the bread on an oven rack, with the oven slightly ajar, and let cool like this (above).

Ooh, that looks good. It turned out pretty much just like it was supposed to.....so (in my best Borat impression) I would consider this a great success!

When you are ready to make your sammiches, just cut the bread in half and add your ingredients and cook em' up. I do not have room in my cupboards for such a specified appliance as a panini maker so I just took 1 pan, 1 smaller cast iron skillet and cooked them this way.

Just baste the outside of the bread with melted butter or olive oil or a mixture of both (that's the way we like it, uh huh, uh huh). Add the bottom piece of bread to the pan on medium high heat, add ingredients to the bread, and put the top of the bread on, smash down with your smaller skillet and turn once the bottom is browned up. Verdict: it was a hit! And very quick. (the meal itself anyway)


Panini Bread

Biga:
  • 1 1/2 cups Unbleached all-purpose flour
  • 1 cup water
  • 1/8 teaspoon instant yeast

Dough:
  • biga
  • 1 teaspoon insant yeast
  • 1/2 cup unbleached all-purpose flour
  • 1 cup white whole wheat flour
  • 1 1/4 teaspoon salt
  • 1 teaspoon sugar
  • 1 tablespoon nonfat dry milk
  • 2 tablespoons olive oil
  • 1/4 to 1/2 cup water
Instructions:
  1. Mix Biga ingredients together and let sit, covered, overnight, for up to 15 hours.
  2. Add all dough ingredients to mixer, including Biga, with flat beater, for 3 minutes on medium speed. The dough should be clearing the sides at this point but if not continue to beat for another 2 minutes.
  3. Switch to dough hook and knead for 3-4 more minutes.
  4. Transfer dough to greased, covered bowl and let rise for 2 hours, punching down once at about an hour.
  5. Divide dough in half.
  6. Transfer the dough to a baking sheet, about 8 x 13 or larger, and shape each piece of dough into a 10 " log. Then flatten out to 3 " across.
  7. Cover the dough with a heavily oiled piece of plastic wrap.
  8. After 2 hours put dough into a preheated 425° oven and bake until golden brown.
  9. Remove loaves of bread from baking sheet, turn oven off, and put loaves back into oven, straight onto rack with door of oven slightly open until loaves are cooled.
  10. Go make yo-self a sammich!


Weekly Menu:

Sunday: Carnitas taquitos (my own recipe with base carnitas at Homesick Texan), Mexican rice
Monday: Mongolian beef, jasmine rice, egg rolls (so good)
Tuesday: Ham & swiss Panini with roasted red potatoes (bread as above)
Wednesday: Garlic oven-fried chicken breasts, roasted cauliflower and broccoli, Mac & cheese
Thursday: Italian sausage with bow-tie pasta, veggies, and fresh parmesan, salad
Friday: eating out
Saturday: leftovers

Wednesday, January 19, 2011

Homemade Chicken Broth

Oh man! The crud has really hit our family hard this week. It seems we are not the only ones, as 48 kids were out at our small elementary school yesterday, my youngest being one of them. So, soup is a big must-have this time of year. Even when we aren't sick, we have hot soup to warm us up from the cold Januaryness about once a week.

A good base can make a soup that much better. We use chicken broth like crazy around here so I decided to learn how to make it. I still pick up a can at the grocery store every time I go but when we have roasted chicken for dinner it is a given that the next few days will yield some homemade broth. You have to try it. It is so much better than the canned stuff. It does take a little bit of time so read through and plan accordingly.

So, you want to start with a whole chicken. Save the giblets from the inside. I also pull the neck bone out and save it with the innards. Just put them in a bag and store in the fridge until you are done cooking your chicken & ready to make the broth. Don't be intimidated! There are tons of great, easy recipes for roasting a chicken. Like this one , or this one, or this one. I prefer slow-roasting it in the oven but you can also do it in the crock-pot if you'll be out of the house all day. Once you are done, don't throw away that carcass! (that sounds lovely, eh?)

You will need a big stock pot. Now, throw what's left from your lovely chicken dinner into the pot. Like this:


Add 2 large onions, cut up in large pieces. Leave the skin on. You are going to strain off all of the whole pieces later on.


Wash 2 large carrots and add to pot.


Cut 2 large stalks of celery in half and add.


Add 10 peppercorns.


1 head of garlic. You don't have to peel these either but break them up a bit.


Add 2 tablespoons of salt. I prefer kosher.


Now add enough cold water to cover all of the ingredients.


Put your pot on the stove, cover, and bring to a boil. Once it starts to boil turn down to a simmer and simmer for 4-5 hours.


After 4-5 hours, take the pot off of the burner and let it cool. Once cool, put in refrigerator overnight.

The next day take out the stock pot and remove any fat that has formed on the top. Heat up just until warm and then remove all of the big parts of chicken, bones, and veggies. It will be all squishy like this:

Next, strain the rest of the broth to get any smaller pieces out, and you are left with your lovely broth.

I can usually fill about 3 of the containers below, which holds 5 cups each.

If you are using the broth within the next few days than keep in the fridge until you are ready. If not, then freeze it.


When you are ready to use, just pop in the microwave and defrost slowly, or in a sauce pan. Now you are ready to make your favorite chicken noodle, chicken tortilla, or even your favorite Italian wedding soup!


Chicken Broth

1 large chicken carcass & chicken pieces from inside of chicken
2 large onions, roughly cut in big pieces, skin on
2 large carrots
2 large ribs of celery, each cut in half
10 peppercorns
1 head garlic, skin on, broken up
2 tablespoons kosher salt
water

  1. Add all ingredients to pot & cover with water.
  2. Cover and boil.
  3. Reduce and simmer for 4-5 hours.
  4. Cool to room temperature.
  5. Put in fridge overnight.
  6. Take out of fridge & remove fat from the top of the broth.
  7. Warm on oven so it is heated thoroughly.
  8. Remove from oven and remove large pieces of chicken, vegetables, and chicken parts.
  9. Strain into another pot.
  10. Use within the next few days or freeze.


WEEKLY MENU

Being as the whole family was sick this week I'll just include the menu here as it was written out on Sunday. It turns out we ate a lot more soup so far this week (Yay for soup) and skipped a few of these:

Sunday: Grilled Brats & Mac&cheese
Monday: Balsamic Glazed Salmon, rice, & green salad
Tuesday: Hamburgers and fries
Wednesday: Cheesy Enchiladas, rice, & beans
Thursday: Tortellini soup, crispy bread, & salad
Friday: Dinner out
Saturday: Leftovers

Sunday, January 16, 2011

Getting Our Paint On

I learned 2 things while painting our hallway. First, our camera stinks for posting blog pics & 2nd, a little paint can make a big difference. Last year we painted our kitchen and bedroom/master bath and I loved the color so much in our master bath that I had to use it again. The color is Ethiopia from Behr. The swatch looks like a brown but up on the wall it looks like a muddy grey. And I love it! So, here we go.....

First, Corey had to fix a few problems spots on the wall. Between 7 years of kid use & a lab/aussie mix dog chewing on everything, the edges were looking pretty beat up. A little spackle and we were good to go.


Here is a nice before shot, including that hideous sconce we had up. If you remember, we just scored some cool-ass sconces off of Craigslist for $20! I love a good bargain. So, if you walk into our front door, and turn to the right, this is the view into our hallway, or was anyway:


This is the view looking out from our bedroom into the hallway (end of the hall compared to the last shot). That is the same sconce that we just can't wait to get off the wall, and some of our painting supplies ready to go.


Ella just loves helping out and since Corey is not the biggest fan of painting she was a huge help. I did the cut in and Corey did the in-between, bigger sections. Ella was my spot painter & general helper outer. Like, hey Ella go turn the radio on. Hey Ella, go get me a glass of water. Hey Ella, quick, grab a paper towel with water. You get the picture.


Here's the front hallway painted:


And here's the hallway from our master bedroom.


Here is the view from opposite direction looking towards the front entrance pathway.


On 2nd thought, I guess I should have put that there were 3 things I learned when painting the hall. The 3rd being that new paint on the walls really accecentuates the fact that our door frames and baseboards needed some upgrading too. So, we taped up the whole area, as seen here looking at the door leading to our bedroom.


And, here is the picture of the new sconce up with freshly painted walls, doorframes, & baseboards. Nice, eh?

Here is a better shot with the new sconce. The baby gate is up for Ace, our dog, who would wreak havoc if he had access to this hall and into the bedrooms.

And, 1 more shot from the front entryway looking down towards Ella's room.

I have a few more ideas for the hallway that we will be adding shortly but whoa, I'm really happy with the results of our paint. And we are just getting started....

Wednesday, January 12, 2011

Weekly Menu

Menu time again.

Stock Up

I want to start by talking about stock items. These are items that you pick up every week at the store. With these on hand, you will have a good start to many different meals. If there is a time, and we all have them, where I am unsure of what to make I know I can always pull some of these items out and whip something up pretty quick. Other times, what you had planned on your menu was just not your mood or you need to get out the door quick, worked late, not feeling well, etc, these basics can help you . Here are my top 10 stock items:
  1. Diced tomatoes
  2. Chicken broth
  3. Pasta (any kind, but spaghetti and fettuccine are tops for us)
  4. Cream of mushroom/cream of chicken
  5. Milk
  6. Fresh garlic
  7. Eggs
  8. Shredded cheese (cheddar & mozzarella are regular visitors in our house)
  9. Rice
  10. Butter

These are the things that are always in my kitchen. I have many more, of course, but these are my top 10. Your stock items may be different but just keep in mind what it is you use on a regular basis and make it a habit of checking for these things before you leave for your grocery shop each week to replenish any of your items that are dwindling or gone. Start off by adding them to your list and you may find that after a while it will become second nature just to pick them up during your shop. Try to buy more when they are on sale. Butter & cheese can be frozen. I hear milk can too but my freezer does not have that much room so we just go week to week on that one.


Part of the beauty of the menu & stock shopping is putting your brain on auto pilot. There are so many important things in your life going on that grocery shopping is probably not at the top of your priority list. So, getting your brain trained to pick up just what you need, and having these items when you need them, already bought, and ready for you in your home, is a step in the direction of simplifying your life.

Here's my menu for the week:
Sunday: Carnitas and refried beans
Monday: Pork Schnitzel & German Potato Salad
Tuesday: Blackened chicken Po Boys and dirty Rice
Wednesday: Chicken noodle soup with garlic bread made with leftover bread from Po Boys
Thursday: Chicken Alfredo with leftover blackened chicken and red leaf Caesar salad
Friday: out to dinner
Saturday: out of town for Camp Tyler (jump rope camp for the girls. Go Bobcat Ropers!)

And yes, I do realize we are having chicken 3 days in a row but the family really wanted the chicken noodle soup & we all decided it was fine since they were all 3 very different dishes.


**Tip** Get to know the people that work at your regular store or stores. You don't have to ask about their life story but say hi, smile, and be friendly. I noticed this at Kroger & again today at Target that the regular workers will point out deals when they recognize you are a regular customer. The regular produce guy at Kroger always points me in the direction of the "good stuff". Last week he showed me some cool Cara Cara pink navel oranges marked to $1 for a bag of 4. He knew that my girls liked to try different types of fruit and thought they might like them. He once brought me 2 pounds of bananas marked to 10 cents when I told him I was making a huge batch of banana bread. Today at Target, I got 2 packages of salmon for 1.99/lb plus each package contained a 50 cent coupon, regularly marked 9.99/lb. The catch (get it catch, salmon, OK that was lame) is these items are usually about to expire. If no one buys them, they cannot sell them so even selling them this much lower is better than throwing them out. In our case, fruit gets inhaled at our house so it doesn't get thrown out. With the meat or fish, either use it the same day or freeze it. You may want to buy freezer bags to make sure the food is stored properly, and if anything ever smells 'off', chunk it. Otherwise, you can save a lot of money this way. I have never gotten sick on meat or fish from a store (knockin on wood) and I buy the marked down stuff pretty regularly, especially when it saves me 8.99 per pound.


Monday, January 10, 2011

Homemade Honey Wheat Bread

I've come to realize that smells are very important to me. Smells of old books remind me of the many hours I spent in my home town's tiny library. A certain scent of Glade Plug-Ins will always make me a little nauseous because when I was pregnant with my oldest daughter it was the scent we were using when I had terrible morning sickness. The scent of apples and cinnamon and crisp air lets me know that Fall is arriving (my favorite season).

So, my first recipe just had to be one of the most wonderful smells in the world IMO! Fresh baked bread baby. Yum. Who needs fancy candles when you can fill your home with this?

First off, you need to start off with the ingredients, the easy part. I always like to pull mine out and set them together to make sure I have everything I need. Nothing is worse than starting a recipe and realizing you have 1 ingredient missing.

The ingredients for the bread will include warm water, milk, oil, honey, brown sugar, butter, salt, all purpose flour, whole wheat flour (or a 50/50 mix of white & wheat flour), and instant active dry yeast.


Add 1 tablespoon of milk, 2 tablespoons of oil, 2 tablespoons of honey, 2 tablespoons of brown sugar, and 1 teaspoon of salt into your mixer and stir.


Next add 1 cup of each type of flour (or 2 cups of the 50/50 mix) and the yeast.


Use a dough hook on your mixer and mix up the ingredients listed above. Once the ingredients are mixed up, this is where things can be changed up a little. Different climates and temperatures can yield different results. The end product you are looking for here is soft to the touch, but not so sticky that the dough comes off on your finger when you touch it. At this point I usually add 1/4 cup of each type of flour at a time, letting the flour mix in, and continuing to test it by touch until is the right consistency. Once it is mixed well, and soft, continue at a low speed for 7-10 minutes, or until it is smooth and elastic looking.


After you have mixed the dough put it in a lightly greased big bowl, turning once to coat outside of dough. Put it in a warm spot and cover with a towel for at least an hour. You want it to double in size. In the warmer months, it's easy to find a warm place, but in winter I usually turn on my oven while I'm mixing the dough and set the bowl on top of the oven (not inside, you don't want it to cook). Turn the oven off and let the bowl sit on the warmed up oven. So it goes from this:

To this. Yay, magic!


This is where my youngest, Audrey, comes in. She loves to punch it down. So, punch it down, or let your kids do it, and let it sit for another 10 minutes.

Then, roll it into a rectangle shape as my lovely assistant, Ella, shows us. If the dough is sticky, add some flour to the surface where you are rolling it out.

Once it is in the rectangle, roll the dough into a loaf shape, pinching the edges together and putting into a greased loaf pan, edge side down. If the edges will not come together easily, add a bit of water to your fingers.

Cover, once again, for about 30 minutes or until the bread rises to just over the top of your loaf pan. Then, it is time to turn the oven on and get cooking. You will want to turn your oven on to 350° and bake for 30-35 minutes. If it is browning more than you like, tent a piece of foil and add on top. After the time is up, remove it from oven and let it sit for a few minutes in the pan. We like to add melted butter to the top as shown below.

After about 10 minutes pop bread out on to a wire rack. Now, you can enjoy the bread warm or wrap it up and save it for later. You can also freeze it. I like to double the recipe and make 2 loaves at a time and freeze 1.

If you are like me, I don't like to eat the ends, so I usually save them in a bag in the freezer or a few in a separate bag and use them for croutons or pop them in the food processor for breadcrumbs. Don't let that yumminess go to waste.


Honey Wheat Bread

1 cup water
3 Tbsp butter (2 in bread, 1 for top)
2 Tbsp brown sugar
1 Tbsp milk
2 Tbsp oil
2 Tbsp honey
1 tsp salt
1 1/2 cups unbleached all-purpose flour
1 1/2 cups wheat flour
2 1/4 tsp instant active dry yeast

  • Combine 1st 7 ingredients & mix well.
  • Add 1 cup of each type of flour and yeast and mix with dough hook. Once combined, continue to add flours, alternating 1/4 at a time and letting flour mix into dough to get a soft, not too sticky consistency.
  • Once mixed to right consistency, continue on low speed for 7-10 minutes, or until smooth and elastic.
  • Add dough to a lightly greased bowl, in a warm spot, and cover for at least 1 hour, or until doubled in size.
  • Punch down and let rest for 10 minutes.
  • Roll out into a rectangle shape. Then, form into a loaf and pinch ends together. Put in lightly greased loaf pan.
  • Let bread sit in loaf pan for another 30 minutes, in a warm place, and covered. Let rise until slightly above edge of pan.
  • Preheat oven to 350° and bake bread for 30-35 minutes. Remove from oven and add melted butter. After 10 minutes transfer to wire rack and let cool.

Friday, January 7, 2011

Let There Be Light

My first project of the year was to update the hallway. It was scheduled for last week but got bumped up because I realized we needed new sconces before getting started. We currently have 2 sconces, one in the front entry hallway as you walk in and 1 in the hallway leading to the bedrooms. They are butt ugly. No really, take a look:


I've been wanting to replace them for a while but haven't gotten around to it. So, on New Year's Day we took a trip to Lowe's to look around. We found a few we liked, but none we loved.

Next, we went to our home-away-from home: Home Depot. Still nothing that impressed us. I didn't like the ones in our price range and the ones we did like were upwards into the $90+ range. I had no idea these things were so expensive.

As usual, when on a quest for home items, our next stop led us to the internet to some of our favorite sites. First stop is Amazon because, well, they sell just about everything.... am I wrong? No luck there this time, though. I wasn't sure if some of our favorite stores like Target or Home Goods would even have much of a selection so before we trekked across North Dallas we decided to check Craigslist. We are not newbies at Craigslist. Corey got his last car through Craigslist. He had to drive to Austin but it was well worth the over $3000 we saved to travel the few hundred miles for it. I believe there are tons of deals if you are cautious and take your time looking for what you need. This time, however, we did not have to take our time. We found the perfect deal within a few days. And the sellers lived about 10 miles away. Score! $20 for 2 beautiful, slightly used sconces that were exactly what we were looking for. Here is 1 of the 2:


Next, we will be painting the hallway and getting our new sconces up.

Thursday, January 6, 2011

Grocery Game Plan

Sometimes, I think they should teach classes in high school called LIFE 101, but I guess it is just a rite of passage into adulthood: How to buy groceries without breaking the bank. Well, here's how I do it, and I don't know why I didn't do it sooner. I suppose I just didn't know any better. Menu planning changed my life. It makes my life SO much easier. I remember going to the store and wandering around, going down every aisle, grabbing what 'looked good'. Thank goodness I've got my head screwed on now. Now listen: It's all about the game plan. You don't go on to the field without knowing what play you are going to run, so why would you go to the store without knowing what you need beforehand. You need a list. This is your game plan! Stick to it! It saves time & money people!

So, you are ready to make your list. How do you do that? First off, don't start off too detailed. Figure out what store you like to go to and pull out their ad or pull it up online. What do they have on sale? Chicken you say? So, chicken on Monday. Sounds good. Let's choose 5 meals this way. Here's a sample of my own weekly meal plan this week:

Sunday: Duck, sausage, & shrimp gumbo with jasmine rice.
Monday: Salmon croquettes, mac & cheese, & Asian coleslaw.
Tuesday: In-laws for dinner to watch the Sugar Bowl.
Wednesday: Vegetarian tortilla soup and simple salad.
Thursday: Roasted whole chicken with potatoes and zucchini with basil butter.
Friday: Out to dinner at our favorite local Tex-Mex restaurant.
Saturday: Leftovers

If you have trouble thinking of recipes, try some of my favorite websites like:

Food.com formerly known as Recipezaar

or even just use your Google skills and imagination, like this: The best chicken recipes or what to do with this zucchini.


I plan on showing you my menu each week so you can get some ideas. Our local Kroger had whole chicken and pork chops on sale this past week. However, we had a big fried (fabulous) meal on Tuesday of chicken fried deer steak, so I changed the pork chop meal I had down for Wednesday to the veggie tortilla soup and salad to get some healthier fare in for the week. Yay, bonus meal for next week's menu. See how easy it can be. You don't have to set anything in stone. Change it up if you need to, but have your list going in.

The next factor in grocery shopping is picking the best time to go. Sometime you just have to fit it in between work and all of the activities but if you have a choice, try and go on a weekday, early to midmorning. This is another huge time saver. Going at peek time will just leave you frustrated and worn out.

So, what else can we do before even getting out that door? How about organizing that list? Ok, you have your menu for the week. However, there are more things you need. Toilet paper, pencils for school, dog food. Whatever it may be, you'll want that on your list. Here's what I do: I have an Excel spreadsheet with categories like fruits & veggies, frozen foods, dairy, etc. Credit where credit is due, this was Corey's idea and it has worked out perfectly. Once we created our list the 1st time we walked the aisles and jotted down what order each category was at our favorite store. So, not only do I have my list, I have it in order as I come upon each aisle. Here is an example of what my spreadsheet looks like. Feel free to use it. If you opened it up you probably see that I also have my menu written there at the bottom. This definitely comes in handy when I am at the store. Before I leave, I double check the menu and everything I've crossed off my list and make sure they add up. Whenever I am home during the week and remember something I need to get, I just open up excel and add it straight to the list in the right category.

The last thing for today and before your next trip is coupons. You can delve deep into the water of couponing or just click a few digital ones on your store's website. There is a lot of free money to be had with a little extra time spent before venturing out. If you are signed up at your favorite store that has a shopper's card you will likely get coupons in the mail. There are coupons all over the internet. Many times, your store will also have their own coupons you can match with regular coupons to get that much more off of a product.

I personally find The Grocery Game to save me money and loads of time. They recently updated their website and it looks great. It does cost money & a little prep is needed but the time and frustration it saves is worth it. I would rather cut coupons while watching my favorite sitcom than hop around to different stores trying to find all the bargains. I spend $15 for 2 stores, charged every 8 weeks, for their service. I save at least that much with each trip. I love to see that total dropping down each week. They have a free trial period to check it out. Give it a try.

Monday, January 3, 2011

Well, Hello There

This is how we do life. Some people seem perfect. We are not them, but we have some things figured out...or, at least we would like to think so. Either way, we are having a great time.

So, who are we?

I'm Pam, he's Corey. We are a couple of people that met and fell in love in 1998. We were married in 2000. (Mainly, so he can count the years we have been married easily). Okay, not really, it just happened to fall on that year. We live in suburbia with our two daughters and two dogs and try our best to walk that fine line of having the most fun we can while saving our money and learning and teaching our daughters how to grow up to be good people. It may not be how you do it. But, this is how we do life.

Since we focus quite a bit on them, our theme of this blog will be DIY Home Improvement, Cooking and Finances; with the occasional gardening, auto mechanics and music thrown in for color.

Don't worry; this is probably the longest post we'll ever do (we hope!)

We are starting out 2011 with a goal that may be a little different than others: Simplicity. Things in life have gotten too difficult so we are trying to get back to basics. We don't want to buy goods we don't love nor keep things in our house that we don't love. We will get back to growing our own food, making things from scratch, and not spending money on things we don't need or adore. We had a good go of it in 2010 and want to show you some of what we did to our house to love it more, but for now I just want to make a few statements: We are taking our lives in our own hands. We are doing things our way. We will have fun doing it! What more could we want?

Home Improvement

One or our passions has become home remodeling. We just can't get enough. Last year Corey decided to just go for it and start moving around our kitchen. And when I say moving around, I'm not talking moving furniture! I mean ripping out windows, bustin' out the U-shape countertops and cabinets and adding a huge custom island, and so on. Again, we will address this later. (Are you intrigued to come back later yet?) Anyhoo....... we will continue this first and foremost. We spent part of New Year's Day watching the show 'Rehab Addict' and realized we were addicts, too. DIY is a sickness of ours that we do not want to cure.

Food

What started out as a way to organize the way we shop for groceries and prepare food has turned into a slight obsession for cooking. About 5 years ago, before we even knew what the heck La Creuset* was, we decided to make menus for the 5-day workweek, starting with some popular websites that send out dinner menus for a small cost. After a while, we realized we were comfortable enough to do the menus by ourselves.

How many of you got home...exhausted everyday from work ... and still had to try and plan a healthy meal for you and your family ...and did not want to trudge on out to the local grocery because you did not have anything put together.... and then just said forget it we will eat out...just this once???

I know some of you do I'll raise my hand because I know what it was like! For REAL!

Anyway, fast-forward to today, it is not uncommon for homemade bread to baking in our oven on a weekly basis and our recipe binder overflowing with great proven recipes. Match that with local grocery sales and Boo-yah: Dinner all planned out. We will be posting our weekly menus to show you how easy it is just to jot it down and get it done. I will write out some of my favorite recipes or point you in a direction of what we like on the interwebs and tips and tricks we have found while learning. One of my goals is to, by mid-2011, sign up for The Daring Bakers' Challenge and post pics & the process here.

The first step of a thousand mile journey: In our case it was planning our grocery shop. The way we made it work was that Corey hated doing the shop so he figured out a way to do it efficiently (and fast). He made a spreadsheet with the categories of stuff in the order of our grocery store. More on that at a later date - but the point is: organize to simplify!

Money, Money, Money, Mon-ay!

He spends, I save. He’s the supply, I’m distribution. We have our roles that help us work together. What makes it work is honesty. Be honest with each other, with yourself on your goals and their specificity and your self-discipline. As you can tell, we take a practical approach to everything, money included. What works for us is having goals and working as a team.

But most importantly, you have to know where you stand with your finances. Take responsibility – its your money! Blame the government for taking taxes, blame your boss for not paying you enough, blame the dog, but in the end YOU have the final say on how your money comes in and where it goes. We try our best and will share what has worked for us and what hasn’t.

Now that you know a bit about what we’re up to, go do something! Find inspiration wherever you can! You know those perfect people we mentioned above? They don’t exist. It’s you, me, and all of us moving forward. Learn something, do something, adapt something your own way.

We just hope we can be some part of your inspiration.

Oh, and BT-dubs:

*La Creuset:

le crueset

Followers